Monday, April 24, 2006

Busy Busy Busy!


Here are my weekend makes. 3 skirts from charity shop sheets and curtains and my lovely Noro Kureyon wrap. When I wear this it drapes like a little jacket and is lovely and warm. I think my yellow ensemble could count as my project spectrum for this month!!
I also have one of my socks complete and have started on the other. I must admit my wrists have been a bit painful so I have had to have a rest from crochet for a few days. Maybe I am doing something wrong!

I have decided after seeing the 'Use what you have' idea on a blog recently that I am going to use that principal as much as possible through my everyday stuff until the Whitsun holiday..... 5 weeks!! I am only buying stuff that I really need to survive (bread, milk etc) and using up all the stuff I have gathered in my cupboards and fridge. This goes for any craft supplies, books, magazines etc etc etc, that I usually spend all my money on.

We have to be careful with our money at the moment as we have booked 3 holidays this year (2 to crete and a round the world trip at xmas) and I want to enjoy them without guilt!
By the way if anyone lives in any of the places we are visiting at xmas and you have good places for us to see please email me as we want to see as much as we can when we have to spend so much time on planes to get there! We are going to:
LA
Fiji
Melbourne
Sydney
Tokyo

How exciting, I can hardly wait.......will have to hunt out yarn stores to spend all the money I am going to save!

Friday, April 21, 2006

Sweet Pea Shawl


Here is my finished sweet pea shawl from The Happy Hooker book. I knit it with the Debbie Bliss yarn I bought the other week. It is soooooo soft and makes me very happy!
I must admit though that I think I will have to have an operation on my wrists to cure the Carpal Tunnel Syndrome!!!

Tuesday, April 11, 2006

Knitted Babes


Here are the knitted babes I made for my nieces at xmas. Got them to do a little fashion show for you. Their names are Elle McSpence (long blonde one ) and Bibi Buttons (Rainbow hair!)
Hope you like them.

Saturday, April 08, 2006

Shopping!!


Been shopping today with no intentions of buying any yarn and.......hey presto! Yarn!
Also some Stags Breath to try tonight. I have been after some for a while. Mmmmmmmmmm.
Now what am I going to knit with my lovely new wool?

Pattern for Fish and Chips

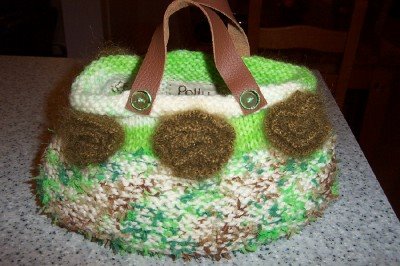
Here's the pattern for Fish and Chips. As usual if anyone has a problem with anything please email me as I am a newbie to this writing things down idea!!


Fish and Chips cabled handbag


Materials
Chunky weight wool , I used Wendy Sarto 4 x 50g balls
Size US 9 , 5.5mm needles.
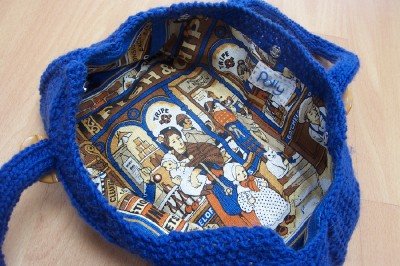
Lining Fabric
4 x Large Buttons
3 large press studs
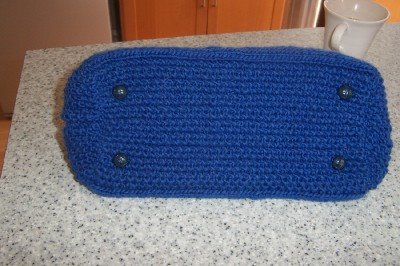
Plastic mesh to line the base. (I used the sort you use in the base of cupboards, quite stiff stuff)
Small half round shank buttons for base ‘nobbles’
Gauge
10sts x 10 rows for 2 ¼” x 2 ¼”

Pattern

Main part
Cast on 78 sts
Row 1: (K1 p1) 3 times, K6, P2,K6, P2, k5, P1, K1, P1, (K1 P1) 9 times, P1,K1, P1, K5, P2, K6, P2, K6,(K1 P1) 3 times.
Row 2: (K1, P1) 3 times, P6, K2, P6, K2, P5, K1, P1, K1, (K1, P1) 9 times, K1, P1, K1, P5, K2, P6,K2, P6, (K1, P1) 3 times.
Row 3: as row 1
Row 4: as row 2
Row 5: (K1 p1) 3 times, K6, P2, cable 6 Back, P2, k5, P1, K1, P1, (K1 P1) 9 times, P1,K1, P1, K5, P2, cable 6 front, P2, K6,(K1 P1) 3 times.
Row 6: as row 2

These 6 rows form the pattern. Continue with these until your bag is as wide as you would like it. Mine is 12”.

If you don’t know how to cable:
When the pattern says Cable 6 back....... Slip the first 3 sts onto a cable needle and put to the back of your work. Then knit the next 3 sts. Bring the cable needle up again and knit the 3 sts off the needle. This twists the cable one way.
When the pattern says Cable 6 front.......Slip the first 3 sts onto a cable needle and put to the front of your work. Then knit the next 3 sts. Bring the cable needle up again and knit the 3 sts off the needle. This twists the cable the other way.

Straps
Cast on 10 sts.
Work in SS for 15”.

Sides
Cast on 20sts
Row 1: (K1,P1) 4 times, K1, P2, K1(P1, K1) 4 times.
Row 2: (K1, P1) 4 times, K4,(P1, K1) 4 times.
Repeat these 2 rows till work measures 4 ½”.
Cast off.

The knit side of the SS line should make the piece fold in on itself a bit so that they don’t ‘puff out’ the sides of the bag. The reverse of the SS line is the right side.

To make up:
First cut your lining fabric to fit the main part and cut 2 pieces for side gussets (leaving a seam allowance to turn under)
Stitch bottom of gusset to base of bag using whatever stitch you prefer, then stitch up the sides to form boxy shape. The top moss stitch edges of the main part should be above the gusset top. Stitch down the SS line of the sides to about halfway to pinch them in a bit.

Cut a piece of plastic mesh to fit the base and place inside the bag.

Pin your lining in the sides first and then the main part. Slip stitch in place catching the sides to the main as you go (this is a little bit awkward so if you have a better idea please do it!!)
Stitch shank buttons to base of bag going through to lining so that it holds the mesh and the lining in place and hides the shank of the button in the knitting giving the appearance of ‘studs’.

Slip stitch the handles down the long edges and stitch to bag, going up the handles to ½” from top edge.
Stitch large buttons on, to hide where you have stitched the handles to the bag.
Stitch 3 press studs along top edge to fasten.

If anyone wants me to email the pattern in Microsoft Works format just say. It may be easier to print like that.

Tuesday, April 04, 2006

Happy Things


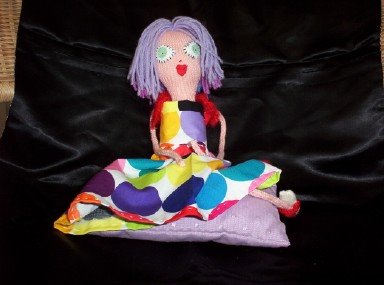
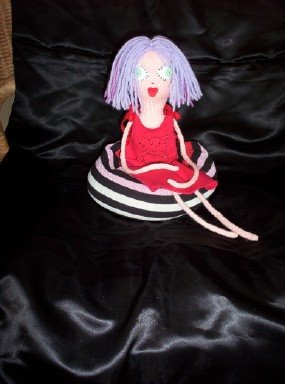
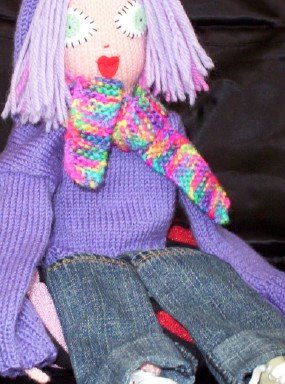
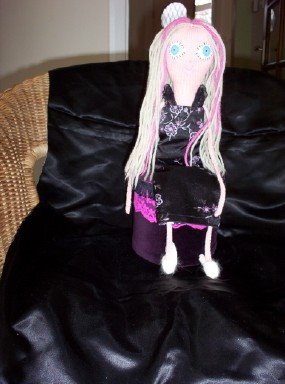
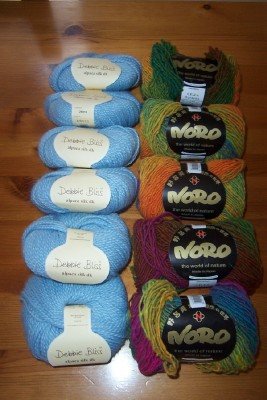
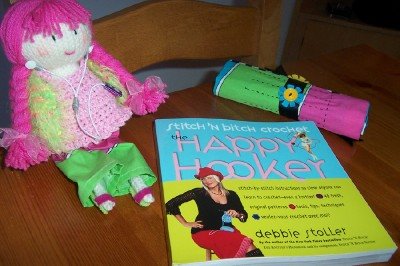
Just some things that make me happy......My new book and my crochet hook roll ready and waiting. Polly the dolly is very happy and looking forward to maybe a new garment! New yarn that came in the post today from ebay. Dyed with all natural stuff apparently and going to be made into some socks from this lovely lady's pattern http://autoscopia.com/amelia/. And last but not least Rodney the amigurumi mouse on his little crocheted blanket. (last pic is my crochet roll open and ready for action.)

Monday, April 03, 2006

Pattern for Camofleur at last!


Here is the pattern as promised. Please tell me if you don't understand it or I have got something wrong. Also I would love to see anyones creations from this pattern. Please send me pics if you can.


Camofleur

Materials
1 x 50g ball aran weight yarn for main part
1 x 50g ball aran weight for top part (I dyed with koolaid ½ and ½ )
1 x 50g ball Bergeres de France Papillion (www.begeredefrance.fr/.)
1 x 25g ball Rowan Kidsilk Haze
4 buttons
Strips if leather for handles
Circular needles US 9 5.5mm (approx 16” cord + needles)
US 7 (4.5mm) needles straight or circular

Instructions

Main Part:
Using one strand of aran and 1 strand of Papillion held together.
Cast on 35 sts
Knit 1 row
Purl 1 row
Knit into front and back of all stitches (70 sts)
Stocking Stitch for 2 ½” ending with a knit row
Joining to form a circle *K 2, K into front and back of next st, repeat from * to last 2 sts, K2.
Knit for 6 ½“.
Change to top wool colour
P2tog P2 to last st P1.
Purl for3”
Cast off.
With smooth (knit) side out stitch side opening together. Fold the base opening together and stitch along edge. Turn right side out (with purl side of stocking stitch outside)
Let the top of the bag roll over to form brim.

Flowers make 6

Using Size US 7 (4.5mm) needles and Kidsilk Haze
Cast on 180sts
Row 1: K1 *K2, pass first stitch over second stitch, repeat from * to last st, K1
Row 2: P2tog to end
Row 3: K to end (43sts)
Cast off.
Roll the flower up to create a rose shape and stitch together. Stitch to bag
Handles
Cut two strips of leather for handles and stitch to bag using vintage buttons to decorate.
To line the bag lay it out flat and cut out the lining fabric the same shape with fold at bottom of bag and a seam allowance of ½”.
Stitch side seams with right sides together.
Put into bag and fold down the top of the lining so that it fits just below the line where you started the top part of knitting. (if there is excess fabric just pleat it to fit)
Slip stitch to the bag.
Put a couple of stitches through the base corners to hold the lining down.
Enjoy!

Saturday, April 01, 2006

Fish and Chips!


Here is my new baby.....Fish and Chips.
This name is due to the fantastic little piece of linen I found at the charity shop. It matched perfectly with the yarn I used. I wanted to cable but not the usual up and down so I knit this sideways on which worked quite well. The base and sides are moss stitch and it fastens with large press studs at the top edge. The base is lined with a piece of plastic draining stuff (like circles all joined together) from 'Wilkos' (fantastic place!) and I stitched four shank buttons on the bottom to look like studs.
I like it and I hope you all do too. At the top is my oldest cat Hazel is looking a little stressed....any clues on how she can relax a bit?